
In gymnastics, there are many gymnasts who would like to be able to do the kip. It is an important element, which is often performed several times in an exercise. Unfortunately, for many gymnasts the kip is an incredibly difficult movement. Yet it is easy to train and the kip is very suitable to build up methodically in small steps. In the following blog we give you tips for learning this difficult element. So that you can prepare the kip in your own lessons with many simple steps.
In this blog, we take you through the technical analysis of the kip. In addition, we will explain the different phases of the element. With this we hope to give you more insight into this beautiful but tricky gymnastics element. Hopefully you’ll be able to get started quickly and effectively in your own gymnastics classes.
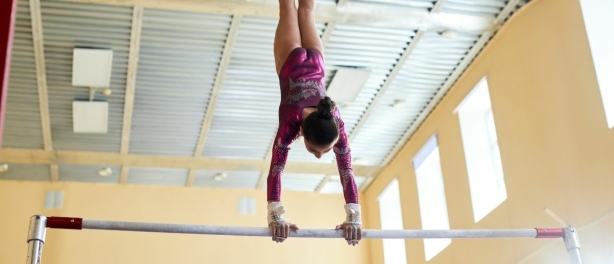
What does the kip look like?
Before we explain exactly how the different phases of the kip are characterised, let us first tell you what the kip is.
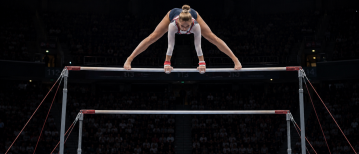
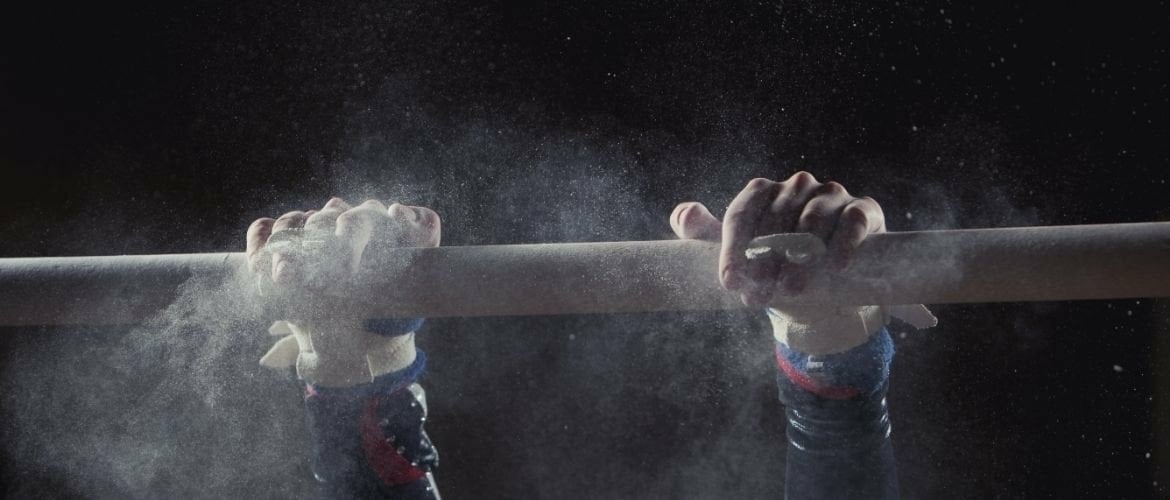
The kip is a gymnastic element that is performed on various apparatuses.
- horizontal bar
- uneven bridge
- equal bridge
- rings
Apart from the different devices, you also have different forms of the kip
The movement in stages
If a kip on the unequal or equal bridge is performed as a jump on the (low) leg, there is a hip angle of about 90 degrees in the first phase of the kip, the approach. The gymnast jumps and hangs from the bar with straight arms. In the front swing, the hip angle is opened and the body is straightened, the stretch phase.
In the case of a kip on the high bar, the connecting phase is with stretched hips. Because the gymnast is hanging so high above the ground, there is no need to perform an angled approach.
Then the feet are moved towards the stick, thus creating a hip angle again. We call this the folding phase. The closer the fold is, the better. You can imagine that some degree of flexibility is also required here.
After this, the legs, from the feet to the hips, are thrust towards the vertical. It is important that the legs stay close to the leg during this movement. Due to the speed and pushing on the stick, your upper body then rises. Finally, you land in support on the bar with your arms extended throughout the movement.
The gliding kip on high bar & bridge with uneven bars:
The silent kip on high bar & bridge with uneven bars:
The hover barge on the bridge with equal layouts:
Walking kip on horizontal bar & bridge:
The silent kip on the bridge with equal layouts:
The kip on the rings:
Different phases of the kip
As with almost every element in gymnastics, the kip is divided into phases. This happens because gymnastics elements are often complex movements. Each phase has a different position in the body. By working with phases, a gymnastics element can be chopped into pieces, and better taught to the athlete. It also makes it easier for the coach to teach an element to the athlete.
The kip consists of four different phases.
1. Start-up phase
As explained earlier, this phase is performed both with and without a rotated hip position. Just to refresh your memory: In the warm-up phase of kip jumping at the low leg, the hips are angled because otherwise the gymnast would touch the ground. The main purpose of the warm-up phase is to create momentum so that the other three phases can be performed properly. Below we show you some exercises for training the warm-up phase
2. Stretch phase
In the stretching phase, the hip angle is fully opened at the end of the front swing. This movement follows either the angled approach phase or (for example on the high leg) a convex approach phase. In the latter case, you are in fact making a convex/concave kurbet movement. This is the movement shown in the video below:
With this exercise, you can train the full opening of the hips at the bar:
3. Folding phase
The name of this phase expresses well what the gymnast has to do; fold! After the hips are fully opened in the stretching phase, the hip angle is now closed as far as possible. The feet are brought towards the stick.

Methodical exercises for training the folding phase:
4. Closure/ducking phase
Finally, the closing/dueling phase. In this phase, the legs are pushed from the leg towards the ceiling. At the same time, the arms are pushed and the arm angle is closed. This ensures that the gymnast comes to support on the bar. It is this last phase that gymnasts often have the most difficulty with. The closing/dueling phase requires a lot of strength, flexibility, and timing. Here are some exercises to train for this phase:
Physical conditions for the kip
As you have read by now, the kip is divided into four phases. Physical conditions apply to each phase. Without mastering these physical conditions, it is very difficult to learn a technically correct kip. We go through them with you below.
- In the first, second and third phases (floating, stretching and folding phase), the gymnast must have sufficient strength in the abdominal muscles. These are exercises you could offer for this purpose:
- In the third phase (folding phase), the gymnast must have sufficient flexibility in the legs (hamstrings). Exercises for this are:
- In the fourth (last) phase (closing/dueling phase), the gymnast must have sufficient strength in the arms/shoulders.
To train this, you could offer the following exercises to your athletes:
Practising kip
Sometimes gymnasts are told that you have to practise the kip very often before you master this element. On the one hand this is true, on the other hand it is very demotivating for gymnasts to keep trying and then fail again. The gymnast then experiences little success in training this element.
In most gymnasts, there are one or two phases in the movement that are not correct and/or the physical conditions of the gymnast are not sufficiently trained. When training and learning this element, it is therefore important to find out what the problem is that movement does not work. First, analyse the gymnast’s movement and decide which steps you need to work on.
Most frequent errors
These are the most common reasons why the gymnast has not (yet) mastered the kip.

Phase 1:
- The technique of the starting phase is not correct. There are different techniques for initiating the kip. The use of the kip also depends on the apparatus on which the element is performed and from which element it is being done. In women’s gymnastics, on uneven bars we usually choose to let the feet touch the ground on the low bar so that the folding phase can then be used. Gymnasts who lift their feet too high on the sweep phase will often have more difficulty in starting the folding phase. At the high leg, we usually choose to make a “normal” swing and preferably postpone the hanging phase a bit (to an overstretched position). For many gymnasts, it is then much easier to do a kip. This is also highly recommended for gymnasts who have difficulty with the kip after a wippertje. Gymnasts often have little momentum after the seesaw. With this technique, you don’t need a lot of speed to be able to make the tipping.
- The posture is incorrect: on both the high and low bars, a gymnast should have a convex posture in the backswing. Some gymnasts initiate the backswing hollowly (especially when jumping on the low bar), causing the gymnast to hang too early and creating a “disruption” in the movement.
- Physical conditions (low legger): The abdominal muscles/core of gymnasts must be strong enough to keep the legs above the ground. If a gymnast has difficulty doing this, it is wise to improve the physical conditions.
Below we show you some exercises to train the kip’s hovering phase.
Phase 2:
In the second phase of the kip it often happens that there is no stretching movement (low legger): the vision of the technique of the kip can differ with coaches. Some opt for a “scooping movement” and others for a “stretching movement”. The advantage of the stretching movement may be that you first pull the stick along. Below, we show you methodical exercises to train this stretching movement.
Phase 3:
The posture is wrong: a common error is that gymnasts perform the folding posture incorrectly. Ideally, you want the legger to be at the ankles/shins and not at the knees. When the bar reaches the ankles/shins, the gymnast can make a large turning circle. A large turning circle often means more speed, which can then be converted into power to close the arm-torso angle. These exercises ensure that the folding phase is performed properly:
Phase 4:
- The posture is not right: sometimes gymnasts tend to put their head in the neck when closing the arm-corner. However, a gymnast is much stronger in closing the arm bend when she has her chin on her chest.
- Physical conditions: the gymnast must have enough speed to actively close the arm-torso angle.
In the video below, you can see that the gymnast has her head in her neck at stage 4.
With this exercise you train the last phase; the closing phase.
How do you teach the kip?
- Make sure there are many practice stations available
- Practise 1 kip phase per station
- Find out what stage your gymnast is still struggling with
- Do several repetitions within a short time for optimal learning efficiency
- Create a perception of success in the athlete
The overall picture of the kip
As you can see, there are quite a few points that have to be right to be able to perform a good kip. The part-part-total method can be very helpful in training this difficult element. First train/improve one or a number of the phases and then apply them to the entire movement.
Finally, we give you some examples for methodically practising the whole kip movement:
Kip exercises for home
1. Bowl
Purpose: This exercise is one of the basic form-filling exercises that will be repeated in the kip.
Execution: Lie on your back. Your back is in full contact with the ground. Keep your arms along your ears and keep your chest round, lifting your shoulder and head off the ground. Squeeze your legs and ankles together.
Variation & tips: perform the kip with an external focus by using materials just like in the film. You can also choose to disturb the bowl by rocking it. Do this without losing your posture.
You can find more of these form-stressing exercises on the Gymnastics Tools platform
2. Remote lying support
Purpose: This is also an exercise for form tension.
Execution: Push your shoulders out fully, keep a rounded chest and squeeze the buttocks and legs together. Walk as far as possible to the far end of the lying position without losing this tension.
Variation & tips: Walk down the wall as in the video or perform this exercise with a foam roller.
3. Candle
Purpose: The candle is a form-fitting exercise that is useful for the stitching phase with the kip. You use your feet to tilt along the stick to the candle.
Execution: Lie on your back raise your hips and legs to the ceiling so that only your upper back remains on the floor. Your hips, knees and toes are in one line like a candle.
Variation & tips: You can also do this exercise with an external focus by lying under a lamp, for example, and putting your feet towards the lamp as if you wanted to tap it with your toes. To increase the tension, you can clamp material between the knees/feet.
4. Kip movement with stick: bowl + candle to sit
Aim: to combine the form tension exercises to ultimately simulate the stitching phase.
Execution: lie down in a bowl with your arms along your ears and a stick in your hands. Bring your feet to the stick and then raise your legs and hips to the sides, while taking the stick with you through your legs until you are in a slow position.
Variation & Tips: Perform this exercise with two piles of books next to you so that you can actually come to your support in a slow sitting position. In addition, imagine that you are putting on trousers during the stitching phase. That helps to make the stinging movement. Note that you are speeding up in the folding-stitching phase.
5. Close arms
Purpose: This exercise is for the last part of the kip where you come to the stick by quickly closing your arms.
Execution: lie down in a bowl with an elastic band (possibly with a stick) behind you. Close your arms as quickly as possible without bending them.
Variation & tips: This exercise can also be performed in a standing position. Stand up and pull the elastic band towards you as quickly as possible with your arms extended.
Example training
To get you started, I’ll give you a sample training schedule for training the kip at home. Make sure you are well warmed up before you start your workout.
I personally like to work in a course format. Set a timer for one minute, this is your working time. Then rest for 20 to 30 seconds.
| Kip home training without rack | ||
| 1. | Basic form tension: bowl |
|
| 2. | Basic form tension: distant lying support |
|
| 3. | Basic form voltage: candle | Round 1: Holding a candle with a pillow between the ankles 2nd round: raising the candle while keeping your legs elevated Round 3: Raise the candle and lower your legs to the ground |
| 4. | Bowl > candle lighting with the stick | Three rounds of this exercise |
| 5. | Close arms quickly | Three rounds of closing the arms with elastic from the bowl |
Kip exercises with rack
If you have the opportunity to train in a playground (with a bar!), there are even more fun exercises for a kip workout. I will go through my five favourite exercises with you below.
1. Jump on
Purpose: learn to jump in a tense position.
Execution: stand in a rounded position in front of the horizontal bar. Jump up slightly and tap the pole in the rounded posture in which you push your shoulders completely out. If you are tense enough you will automatically be pushed away from the bar.
Variation & tips: You don’t want to ”hang” in the kip. Keep the tension in your upper body (read sternum round, push shoulders out fully). A good approach is half the battle.
2. Swinging
Goal: Maintain form in your kip swings
Execution: Stand in front of the laying person. You may jump to it or start your swing from a standing position. Keep your chest round and your arms along your ears. In the swinging phase, make yourself long and keep your feet as close to the ground as possible. Then swing back without touching the ground.
Variation & tips: you can choose to provoke the stretching phase by placing a water bottle in front of the rack where your feet have to go.
3. Fold to candle
Purpose: to train the stitching phase
Execution: Hang on to the stick with stretched arms. Keep your feet near the stick and raise them to a candle.
Variation & Tips: This exercise is very heavy. If necessary, someone can help you keep your feet on the stick.
4. Close arms
Aim: the last part of the kip: training the arm-closing phase with wrists.
Execution: Stand in front of the horizontal bar. Jump on the bar to support yourself with stretched arms. Try to do as little as possible with your legs and to lift yourself up the bar as much as possible with your arms stretched out.
Variation & tips: preferably choose a low bar for this exercise.
5. Kip with loops
Purpose: train the full kip movement
Implementation: attach yourself in the loops and make a kip
Variation & tips: choose a running kip, silent kip or kip series.
Sample training kip on the rack
| Kip home training with rack | ||
| 1. | Jump on | 15 repetitions |
| 2. | Swinging | 8 repetitions |
| 3. | Fold to candle | 8 repetitions |
| 4. | Close arms | 15 repetitions |
| 5. | Kip in the loop | 8 repetitions |
Perform the five exercises in a course format. Do not proceed to the next exercises until you have completed the number of repetitions, provided that the execution remains correct. Rest for about 1-2 minutes between exercises if necessary. Do four rounds of the exercises.
Methodical construction of the kip
When gymnasts are first introduced to the kip, don’t let them perform a full kip immediately.
In gymnastics, we often chop up profile elements such as the kip. By practising many small partial movements, the offer to the athletes is large and diverse. In this way, they become optimally acquainted with the movements in the element.
In addition, a specific part of the kip can be practised, if a child needs more practice there. A gymnast, for example, can already make a nice hover, and is able to fold her body sufficiently. However, she still has difficulty pushing on the stick and closing her arm/hip angle, in order to eventually succeed in the kip. In this case, exercises for the last phase of the kip can be offered. On the Gymnastics Tools platform, there are more than 50 videos with methodical exercises to teach the kip. Also check out our free kipping drills checklist.
Hopefully you’ve picked up some useful tips from this blog, which you can apply in your own gymnastics training. Do you have any tips for teaching the kip in phases? Let us know in the comments.
Good luck with your practice! Do you want more exercises? Check out our Youtube channel or join the Gymnastic Tools Platform and get access to all 2500 methodical exercises.