
Most girls (and boys!) who do gymnastics are pretty agile and flexible. They do splits without any difficulty and prefer to stand on their hands rather than on their feet. Most gymnasts think the back walkover is a cool and beautiful element to learn. And they are certainly right! If you want to learn how to do the back walkover, then read on! We, from Gymnastics Tools, will explain exactly what to do.
What is a back walkover?
With a back walkover, you start in a standing position on your feet with your arms along your ears. You then lift one leg to a horizontal position, your upper body bends backwards and you place your hands on the ground behind you. After this, you push off with the leg that is still on the ground, come to the splits handstand position, and finish with a bridge, with your body in the form of a bow. Next, your body comes back upright via the splits handstand position to stand on your feet.
At first glance, a back walkover may seem like a fairly simple element, yet it requires strength, agility, and body control to perform.
Fortunately, there are a number of steps you can practice, so that you can quickly master this elegant trick!
Which muscles are involved?
Mobility is required from the following muscles:
- pectoralis
- latissimus dorsi
- rectus abdominis
- iliopsoas
- Quadriceps
Mobility tips & training
The most common mobility control is that of the shoulder girdle. In the adjacent picture, the blue line indicates a fully opened shoulder angle, with the arm next to the ear (180 degrees). The red line indicates a shoulder angle that is not fully open. It is necessary that the shoulder angle can be fully opened. This requires sufficient mobility of the small pectoral muscle.
If you notice that you cannot fully open the shoulder angle, you can use the exercises below to stretch the muscles.
Exercise 1
Execution: Place the elbows on an elevation. Hold the forearms vertically (not as shown). If necessary, use a stick that you can hold. Push the sternum downwards. Avoid excessive arching of the lower back. The stretch should be felt between the shoulder blades and in the armpit.
Parameters: 4 x 20 seconds holding the rack
A common compensation is to draw the sternum up to raise the arm next to the ear. Keep the sternum retracted by actively ‘crunching’ the ribs towards the hips. In this way, you also train the mobility of the extension of the upper back (thoracic spine).
Exercise 2
This exercise is specifically for stretching the small pectoral muscle. It is generally most restricted when opening the shoulder angle.
Hold this stretch at various angles above 90 degrees (above shoulder height). Keep the shoulders and hips parallel. Push the shoulders through the doorway until you feel a stretch at the front of the shoulder, at chest level. Maintain this stretch.
Parameters: 4 x 20 seconds holding the rack
Tips for learning a back walkover
At the little bridge, pay attention to the:
- Keep your feet flat on the ground;
- Legs are stretched and closed (knees and ankles stick together);
- Knees and arms are stretched;
- Hips and shoulders are fully opened;
- Shoulders above the hands, or over them;
- Hands are shoulder-width apart;
- The arms are along the ears with the head in between;
- Chest is pushed over the arms;
Hopefully you will be able to work on the above tips while training the small bridge. All in all, it is an essential element to train, also for the mobility required in other elements such as the backflip or backflip. Don’t skip it!
How to learn a back walkover in gymnastics?
Step 1
Practice a small bridge until you are flexible enough to stand with open shoulders, straight hips and straight legs, like the gymnast in the picture below.

An alternative exercise to stretch your shoulders is the following:

Step 2
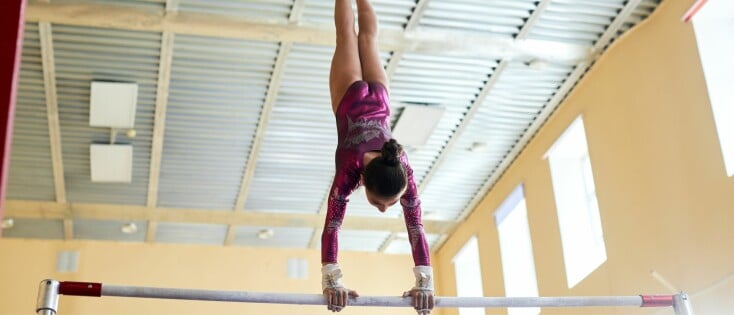
Secondly, you have to be able to master a handstand when performing the back walkover. After all, during the walkover, you come back to your feet via the splits handstand. By practicing the handstand against a wall with your hands at arm’s length from the wall, you get more comfortable in this position. Make sure that your shoulders are open and that your hips are nice and long.


Step 3
Once you have mastered the steps described above, you can move on to the last part of the back walkover, the tumbling.
Push out a back walkover on a sloping surface. The more inclined the surface, the easier it is to turn around. Throw your legs up in turn and try to turn into a handstand. Challenge yourself by making the push-off surface less and less inclined.


If you can turn around on a straight surface, go to step 4!
Step 4
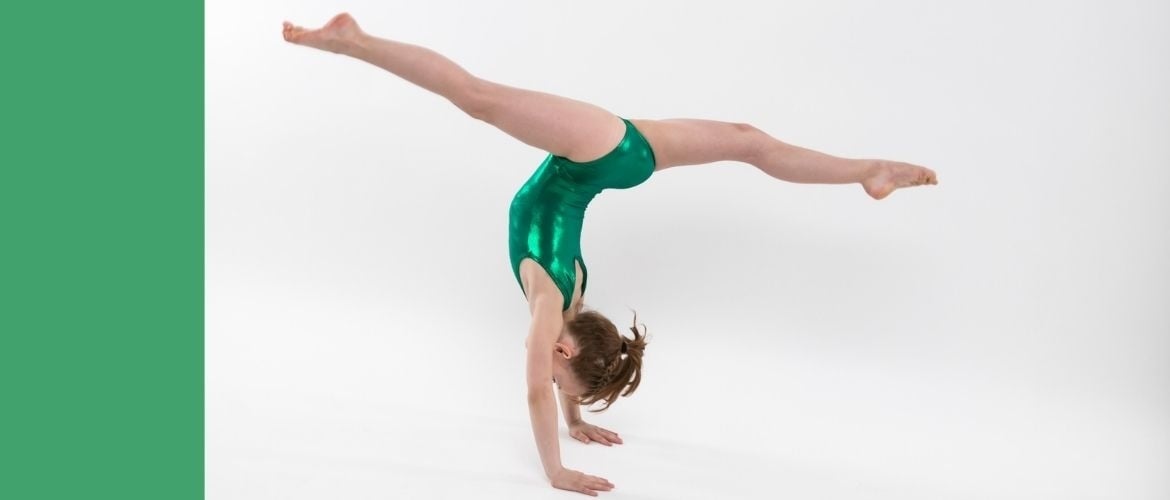
First of all, stand in a slightly straddling position with your arms along your ears. Bend your body backwards and come to a standing position. Then turn around and stand on your feet in the splits hand position. If you can do this, you can perfect it by doing it with your leg raised, like the gymnast in the pictures below.


Good luck with your practice! Do you want more exercises? Check out our Youtube channel or join the Gymnastic Tools Platform and get access to all 2500 methodical exercises.
Can you do a back walkover? We are curious!